Flashing Firmware
There are three ways to update Kamoji's firmware: the Kamoji app, the easiest, with no cable or computer; the one-click web flasher over USB; and the full ESPConnect interface for advanced use.
Kamoji app (easiest)
The Kamoji app updates the firmware from your phone. It downloads the latest firmware, then sends it to Kamoji over Wi-Fi.
- Open the Kamoji app and tap your Kamoji on the Discover tab to connect to it.
- If a newer firmware is available, My Kamoji shows Update firmware. Tap it, then tap Update now.
- Keep the app open and your phone near Kamoji until the update finishes.
Kamoji also updates itself over Wi-Fi once it has joined your network: see OTA Updates.
Web flasher
The Kamoji web flasher installs the latest firmware from a computer over USB — no toolchain, no picking files or offsets, just connect and click.
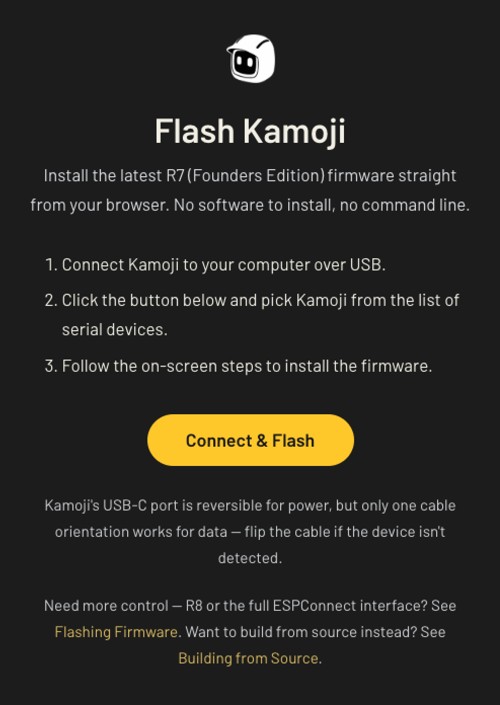
- Connect Kamoji to your computer over USB.
- Open the Kamoji web flasher and click Connect & Flash.
- Pick Kamoji from the list of serial devices, then follow the on-screen steps to install the firmware.
Use it when the app can't reach Kamoji, for example to recover a Kamoji that no longer starts up. Read on if you need more control.
ESPConnect (advanced)
ESPConnect is the same browser-based flashing tool the web flasher is built on, but exposed in full — still no toolchain install required. Reach for this if you want to poke at Kamoji's internals: browsing its internal files, inspecting the flash partition layout, or flashing to a specific offset rather than just installing the latest production firmware.
-
Download the latest production firmware for R7 (Founders Edition) from:
https://nodered.kamoji.bot/esphome_firmware_download?name=kamoji-r7-production&factory=1This is the full factory image (bootloader, partition table, and app all merged together), meant to be written starting at flash offset
0x0. -
Connect Kamoji to your computer over USB.
-
Open ESPConnect in a WebSerial-capable browser (Chrome or Edge).
-
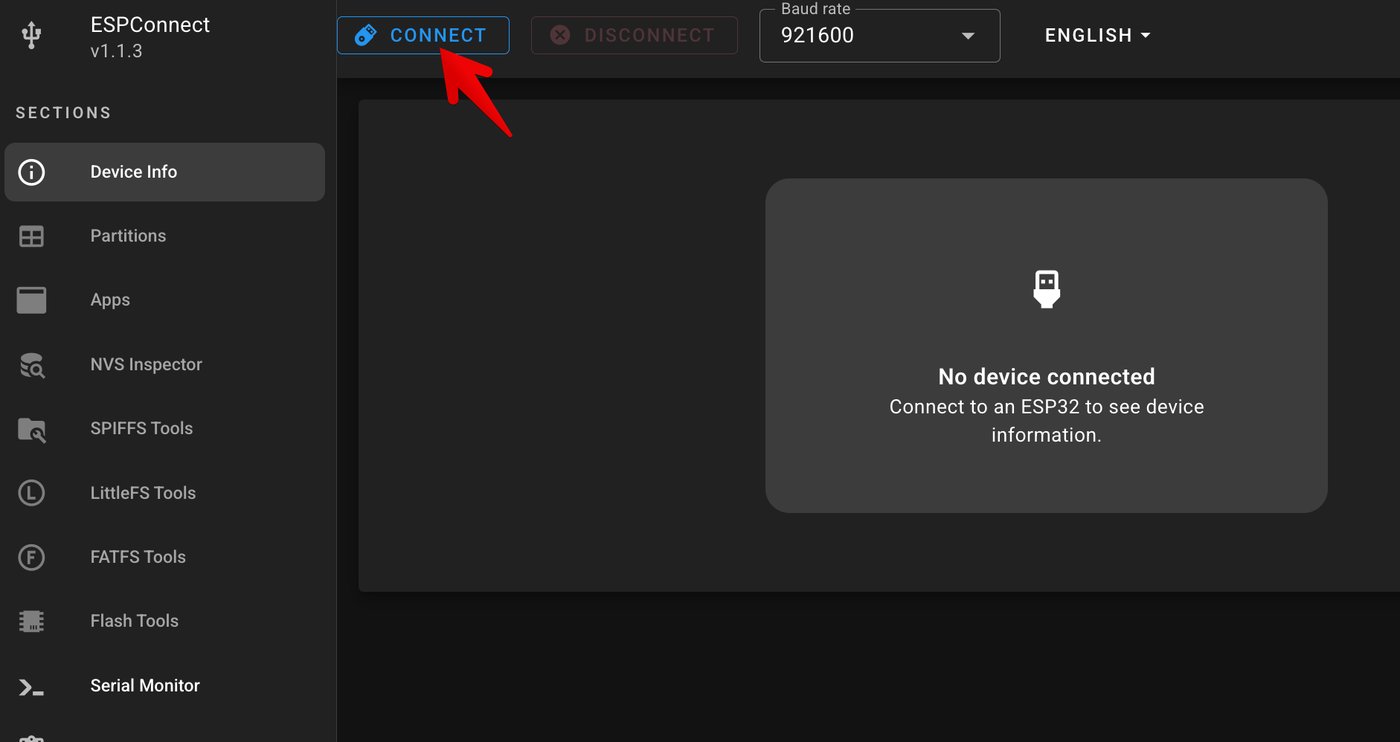
Click Connect in the top bar.
-
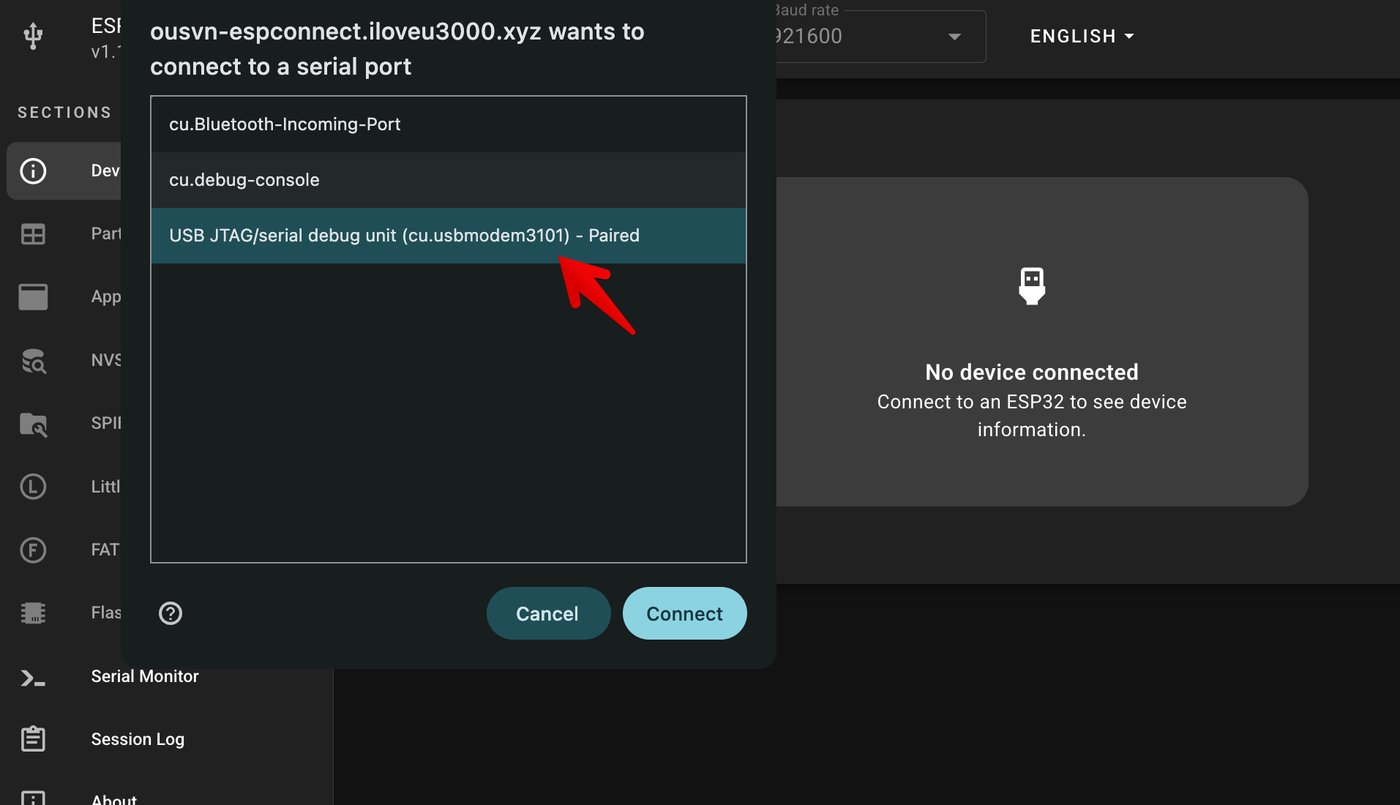
Your browser will prompt you to pick a serial port. Select the entry for Kamoji — it usually shows up as a USB JTAG/serial debug unit — and click Connect.
 note
Kamoji's USB-C port is reversible for power, but there is only one orientation that works for data. If you don't see a USB JTAG/serial debug unit port, try flipping the USB-C connector on Kamoji.
-
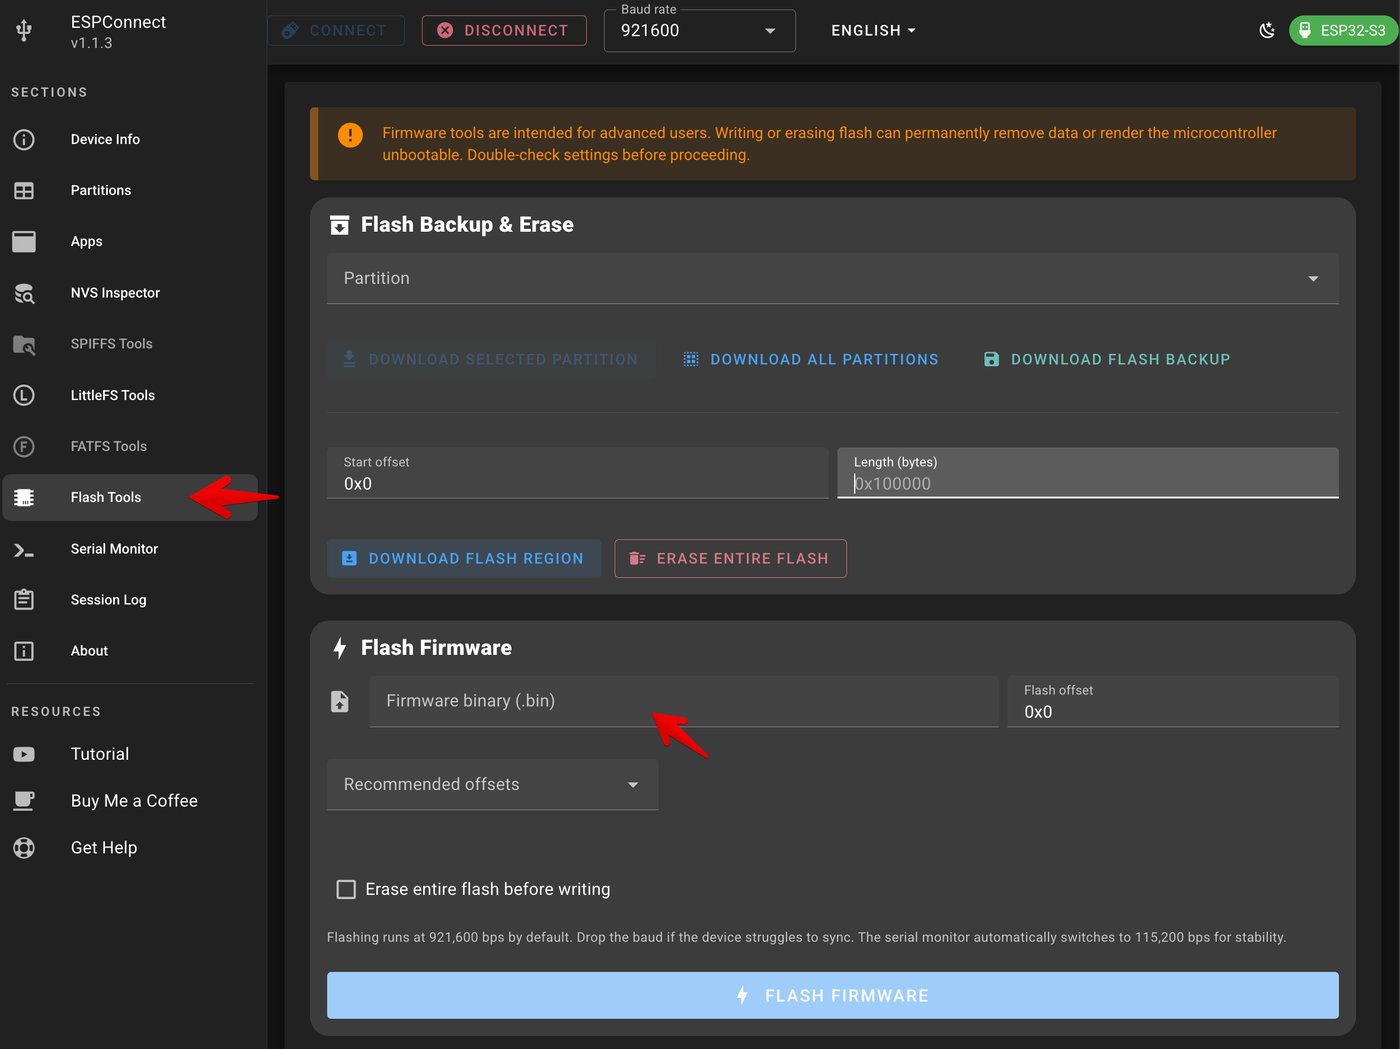
Open the Flash Tools section from the sidebar, click the firmware field under Flash Firmware, and select the
.binfile you downloaded in step 1. Leave the flash offset at0x0, then click Flash Firmware.